Pages

Thursday, June 30

Art Journaling: The Perfect Bathroom

Thank you, thank you, thank you  for all of your love
and well wishes for Josh and our new family of 4.
Thank you for sharing in our joy.
We are overwhelmed
& taking in every minute.


I'm linking up with Gussy's Inspiration Workshop today
I thought it would be a good excuse to play in my art journal.
The only rule I have for my journal is to play & try new things.

The prompt:
The Perfect Bathroom

For my background I started with a few colors of paint.


Then added paper.


Then doodled and dreamed.


Then added more paint.


And put it all together.


My perfect bathroom would have to have...

fresh flowers everywhere
an enormous claw foot tub
really good water pressure
an abundance of perfectly folded warm white towels
yummy glass jars full of expensive soaps from France.
a separate space for a well ligthed beauty station
did I mention fresh flowers everywhere?


Gussy Sews Inspiration Workshop!


Photobucket

Saturday, June 25

Newborn Bliss

Meet
Joshua William Butson


8 lbs. 11 oz.
of pure sweetness.


Thank you for all of your
thoughts and prayers.
We felt them all.


Labor and delivery went
better than we could have asked for.


We came home Thursday afternoon
and we are in baby bliss.
Josh is as sweet as can be.


Jack is getting used to being a big brother.


And we are settling in to life together.


I am so thankful that Darryl will get to
be home with us for a month.
We are loving having daddy home.


I forgot how sweet and perfect and yummy newborns are.

Thank you again
for all of your blog love.
I'll keep you posted.

Monday, June 20

And we're off...

We've been busy over here...


unpacking bins of teeny tiny baby clothes,


setting up the swing, and the pack'n'play,

Source: etsy.com via Erin on Pinterest


installing the baby car seat


and packing our bags.

Source: flickr.com via Erin on Pinterest

we're off to the hospital at 6:15 tomorrow morning
to welcome our little boy into the family.

I'll post when I get home.

Please pray for health and peace and joy and
everything else good and lovely for our family.
Photobucket

Saturday, June 11

Top 10 Craft Fair Tips: Part 2

*** Okay I'm a day late, but here it is...***
Find Part 1 here.
Source: google.co.nz via Erin on Pinterest


6. Make  & bring way more inventory than you think will sell.
 
Every single time I have been a vendor at a craft fair
I have felt like I've had a ton of inventory,
because it's usually all over my little studio
& my living room & my garage.
It feels like it's going to take over.
 
But once I get there, and spread it out
in a 10x10 space, it doesn't look like that much.
I usually end up trying to make it look like more.
Which brings me back to Step 1.
How you display your items will make the inventory look really full or sparse.


Source: flickr.com via Erin on Pinterest


Source: flickr.com via Erin on Pinterest

7. Be familiar with your money stuff.

ack. ugh. yuck.
Can I just complain for a little bit?
Can we just skip the money stuff and have it
magically appear in my bank account, please?
We are artists, not accountants, right? 
Um, wrong.

I hate money stuff, but it's reality, right?
Okay, I'll justy get on with it...

I used Propay to accept credit & debit cards
which, yes, is another expense,
but it's also the way that most people paid,
so it was pretty necessary, and worth the extra expense.

But I didn't really practice using it before,
so I really had no idea what I was doing
which made for some awkward and embarrassing moments.
People get (and should get) sensitive when you are dealing with their money & cards,
so just practice before, and do you best.
That's all you can do, right?


8. Have signage & branding well displayed.

At my first fair I had one small sign with my name on it,
 supposed to be attached to the front of the tent with industrial strength velcro,
 and the velcro kept falling off. So I had no signage at all. None.
To tell you the truth, it didn't even occur to me.

For my next couple of fairs I hemmed & painted some
 scrap canvas, which turned out really cute.
For the Queen Bee Market I used pieces of scrap wood for my big sign,
but I also out my logo and my name on everything, like 10 times over.
Signage doesn't have to be fancy or expensive, it just needs to be there.

My reccomendations:
Have multiple signs with your business name and logo everywhere.
All over your booth, on your product, up high, down low, too slow.
Seriously... everywhere you can think of!
This time I put my name and logo on everything.
It can only help you.
9. Have prices clearly labeled everywhere.


After being a shopper at craft fairs & markets, I know
how annoying it is to not have prices clearly marked.
I don't want to ask anyone unless I really love it.
If I can't find the price I'll usually just put the item back and move on.


At my first few shows, I had signs on the back of my paintings
and on baskets, but it really wasn't enough.
As much of a pain as it is, I now put sticker labels
on the front of every. single. item. (with my name & logo)
pain? yes.
worth it? yes.

10. Go out of your way to be friendly and meet people.

We're all in this together.
One of the best parts of this handmade community is the people.
So introduce yourself, say hello, tell them what you like about their booth or product.
It just makes everything more fun to support & feel supported.

At my first couple shows I was so, so nervous.
I couldn't help but feel like I had no idea what I was doing (I didn't),
 and everyone looked all professional and their booths were cuted out.
 I was so insecure and  intimidated. I don't think I said hello to one person all day.

Warning: Showing your products to the public may make you feel
super exposed and vulnerable and naked.
It's weird, but true. That's a whole different post.
Anyway, I needed to get over myself and be friendly.
which I've done now and getting to know great people has made
 worlds of difference in the "fun" factor of shows.

**********************************************************************

That's all I've got for now.
I've really enjoyed hearing about your experiences at shows.
Do you have any more tips, tricks, or advice?
We would love to hear them.

Next week I'll be posting on the positives:
Why you should sell you work at a craft fair.
There are many.
Happy weekending!

Thursday, June 9

Top 10 Craft Fair Tips: Part 1

***Okay, I'm starting with 5 tips because I have so much to say & this post is already too long.***
*** I will post Part 2 tomorrow.***


After having a booth at the Queen Bee Market,
I wanted to share with you some tips I've picked up.
This was about the 6th show I've been a vendor at,
so I'm not a veteran, but I always learn so much at each show.
 Above all else:
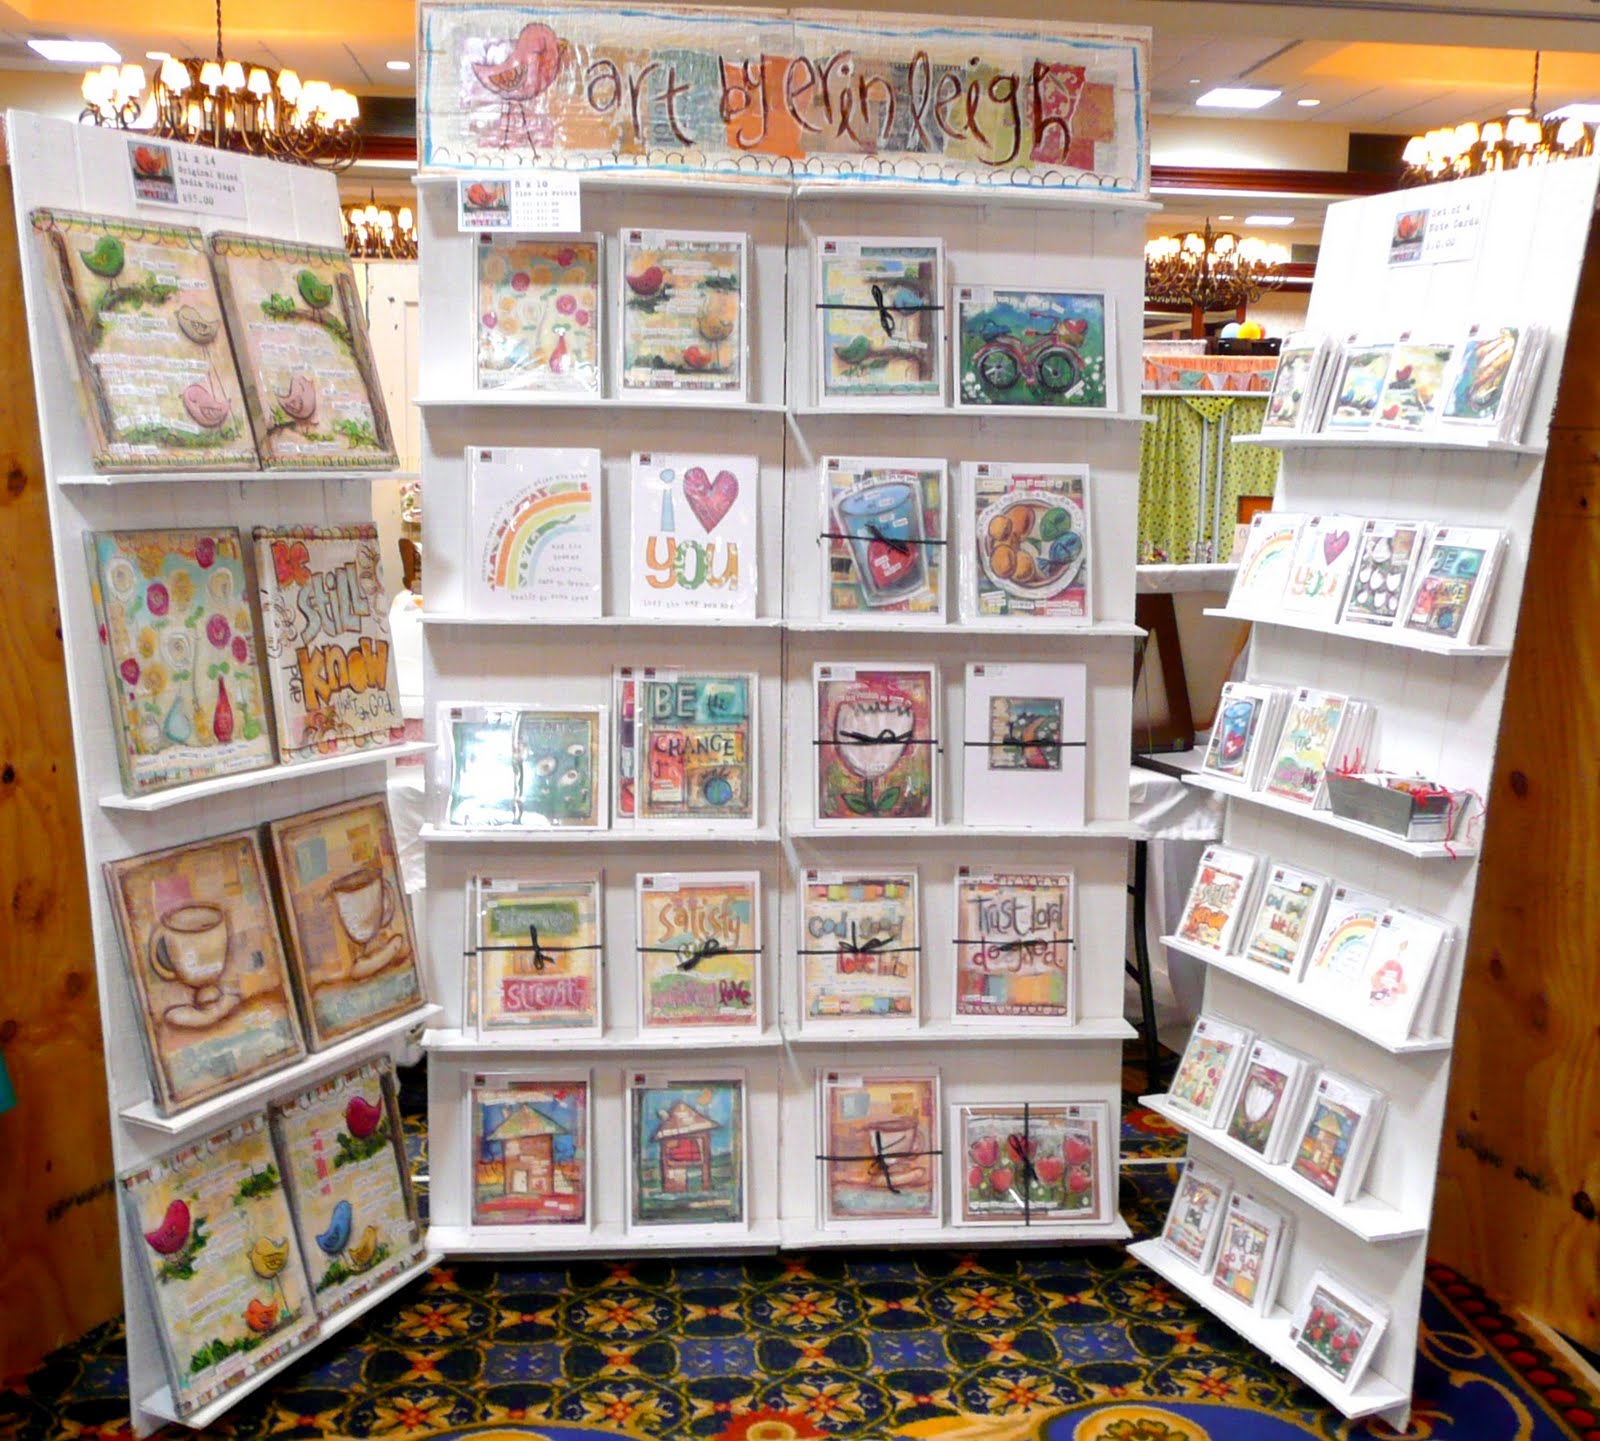
1. Invest thought, time, & energy into your booth display.
I was so focused on my art for the first few craft fairs that I didn't
spend much time thinking about the display.
I ended up hanging some originals in weird awkward ways because
I didn't have a good hanging system, and putting all of my prints
in wicker baskets so they couldn't be seen.

Without a thoughtful, engaging display,
all of my hard work and time and money seemed wasted.
Be sure to research and figure out the details of your set up.
Practice setting up your booth way before the big day.

My booth display this time...


As you can see, it's super simple,
but all of the space is used and
the product can be seen.

You booth needs to be:
Practical:
My art need to be seen!
Think vertical & varying heights to maximize your space.
Easy to set up and take down.
It all has to fit in my minivan.
I need to store it in my garage without
driving my husband crazy.

Affordable:
It can't break the bank.
My budget goal for Queen Bee was $100 for the whole display.
I ended up spending about $170 after going back
to Home Depot about 17 times. (See # 4).
*Tips: Make friends with the guys at Home Depot & ask them how to make stuff.
*Look in the used wood bin at Home Depot. $.50 for some great, big pieces.

Adorable:
Pay attention to detail.
It needs to make people want to stop & look. 
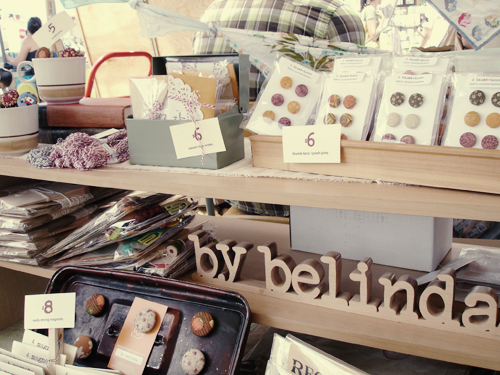
Queen Bee had the best, cutest both displays I've ever seen.
There is so much more I will do next time to cute it out.
But this was a start.


2. Know thy venue. 

I can't stress this enough!
an art fair, a street fair, and a craft fair
are 3 very different venues with very different clientele.

Don't just sign up for anything!
Take time to think about your product and where it will fit best,
and your target market and where they will be.
Attend the venue and take note of booths that stand out
and get attention, what they are selling and their price points.

My experience:
My first venue was a street fair in a small town.
I only brought original paintings. I sold not one thing. Not one.
 I was so discouraged. But duh...
When I go to a street fair I bring $10 to spend on kettle corn & maybe a pair of earrings.
I don't go there looking to spend $125 on original art.
and neither does anyone else.
That doesn't mean I can't do street fairs,
it just means I need adjust my inventory & price points.
Which brings me to # 3...


3. Have a variety of price points.

Honestly, I don't like selling cards.
I barely make a profit and they are a pain to fold and package.
But, I view them as part of my marketing.
They provide an inexpensive price point for someone who wants to buy a piece of my work
and when someone sends a card to someone they care about
with my name and information on the back, it's free marketing for me.

I know when I find an artist I love, and want to remember,
I usually buy a card, or a set of cards (what I can afford).
And if I have that art work lying around, if I love it enough,
I'll purchase artwork when I can.

Also a variety of price points (having inexpensive items) draws people in to your booth.
I can't tell you how many times people stopped to look at a $3 card
and ended up purchasing a print, or even an original.

With a variety of price points, and more inexpensive items,
you're going to have a lot more sales.
Which is just way, way more fun and engaging,
and gets you connecting with customers, too.


4. Be prepared to spend way more money than you expected. 

Whatever you think your budget is, double it.
It's really annoying. An emergency trip to Kinkos. 73 trips to Home Depot later.
A $50 budget can easily turn into $300. Just be prepared.
I'm sure the more shows I do, the less unexpected costs will pop up.
Plus, I think I have most of the emergency items I need now.
But I also know that I will probably always spend more than what I plan.


 5. Be prepared to spend way more time than you expected.

So far, every time I've done a show it doesn't just take up the time during the show,
it consumes my whole world for at least 2 weeks before.
Countless hours are spent  thinking, listing, planning, and preparing.
which takes away my focus on my family, which is the whole reason I'm doing this:
For my family, to be home with my babies.
I have to believe that, if I do this more, the learning curve will even out
and it will take significantly less time and energy. Right?

 I try to keep track of every hour spent,
in order to find out how much money I'm really making.
But the bottom line is that it will always take way more time than you plan.
So just plan on it.

And remember:
Everything is a learning experience.
Flickr has some great groups with photos & creative ideas for booth displays.
Here and here and here

Tomorrow I will get to Part 2!